Gallery
How to series
What you’ll need to get started
Before you begin, make sure you’re wearing the right safety gear for the site you are working on, and the tools you are using.
There are many reasons a product may need adjusting:
All of our operable windows have built-in adjustment allowance to accommodate this.

To begin, visually inspect the product from the inside of the house, looking at the gaps between the sash and the frame at the bottom and on the sides. If the sash looks crooked in the opening, take note of which side needs to be raised or lowered to square it back up.
Top tip: If both sides are rubbing at the bottom, both sides will need to be raised.

To perform the adjustment, firstly, unsnap the aluminium trim from under the head or transom of the frame by slotting a scraper between the trim and window frame. Gently tap the scraper with a mallet to lever off the trim.

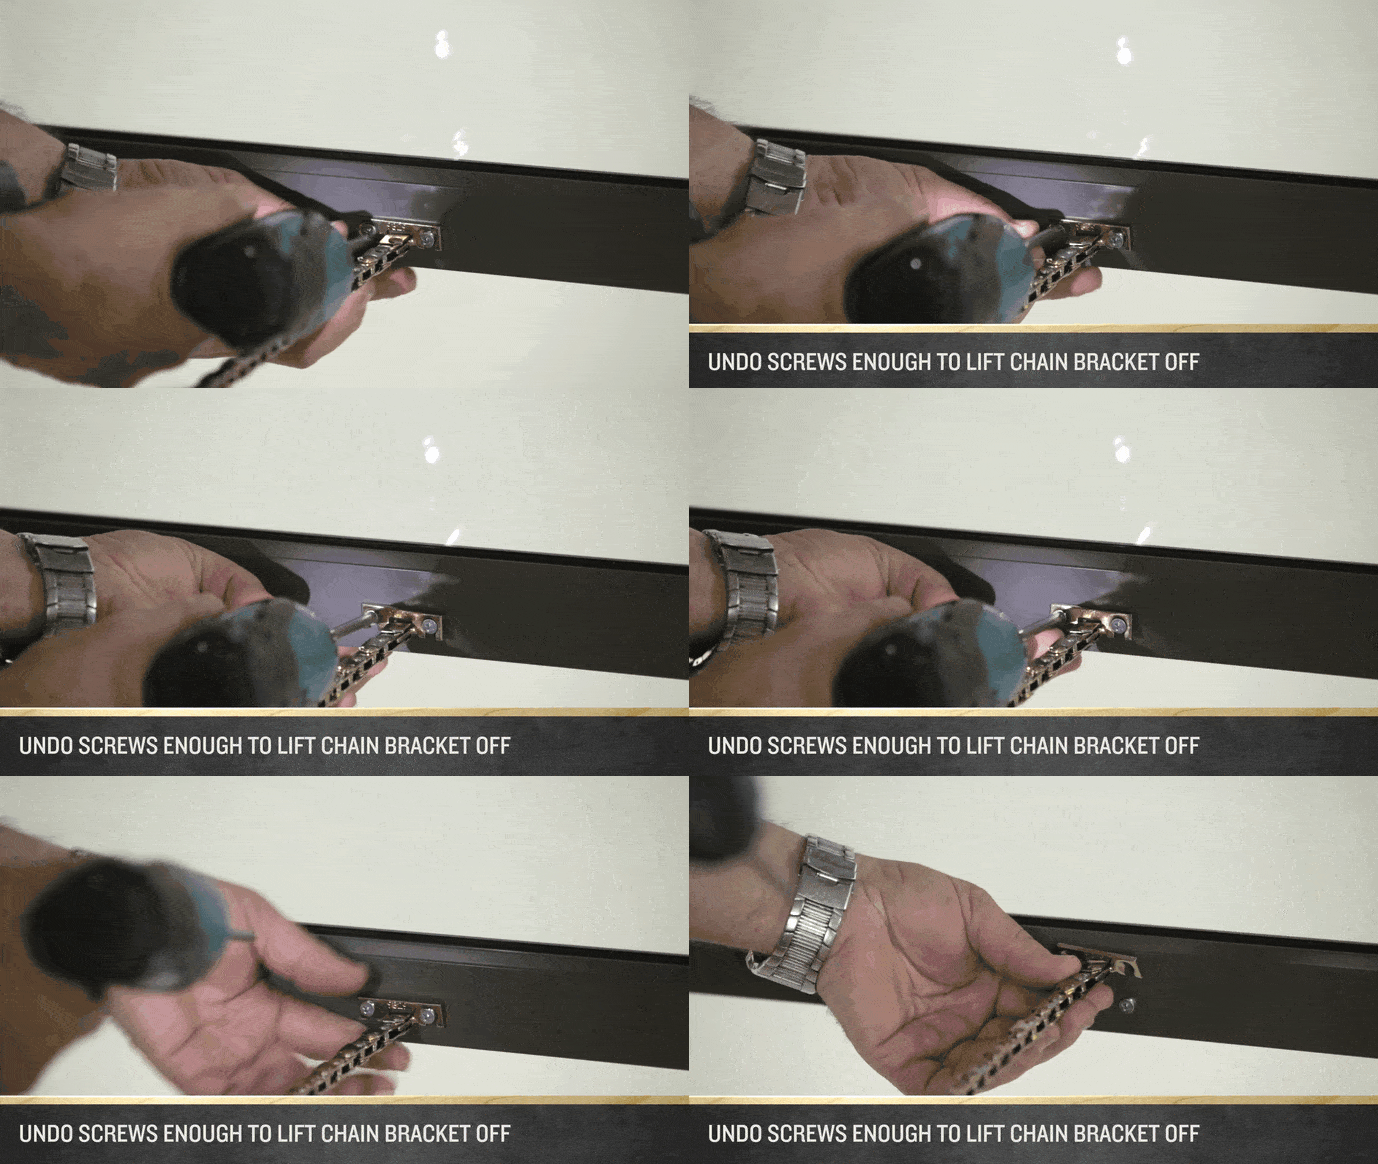
Next, open the sash to access the screws holding the chain to the sash.

Loosen the screws enough to allow you to lift the chain bracket off.
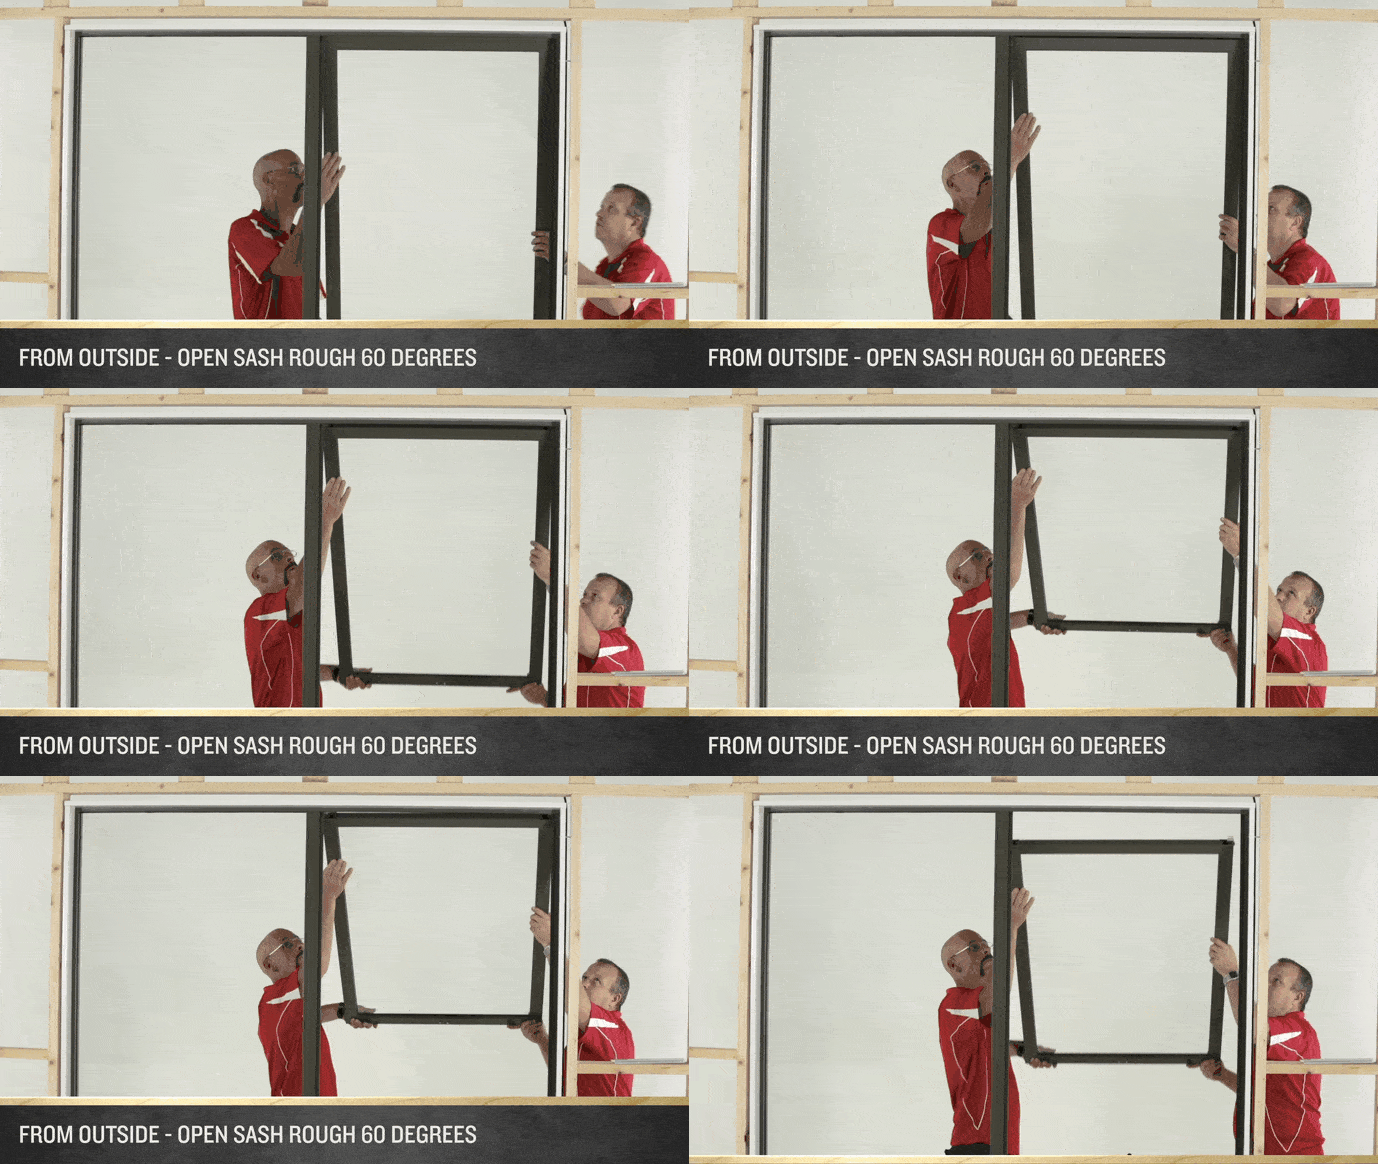
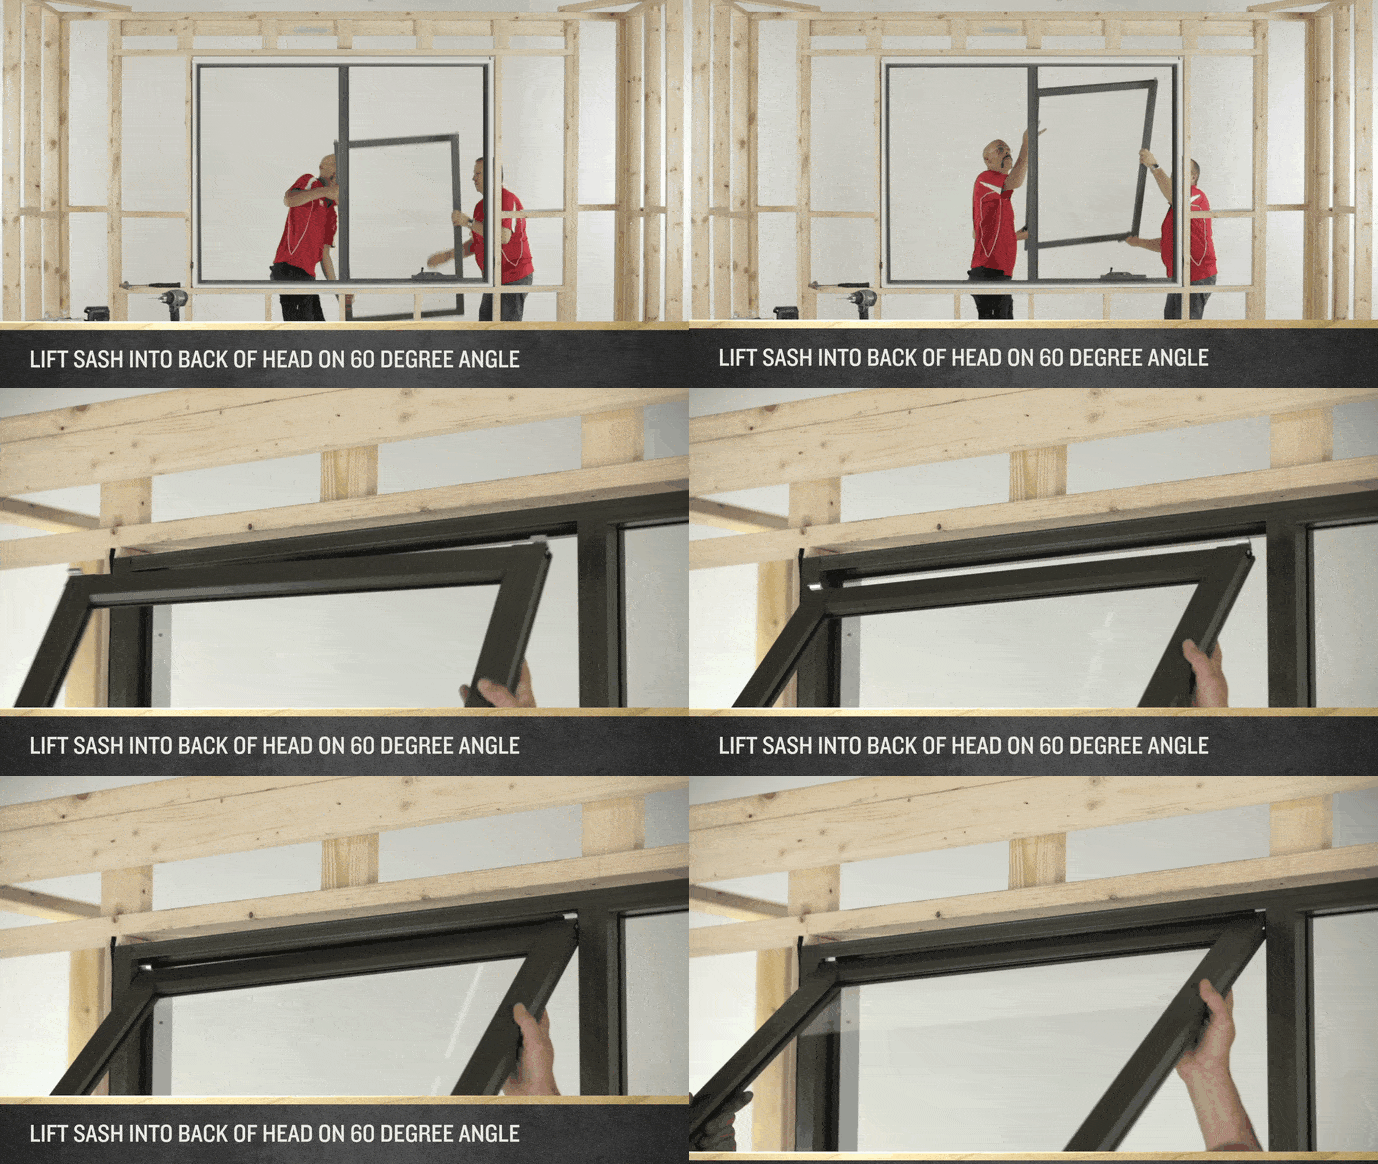
When standing outside of the window, open the sash roughly 60 degrees, ensuring there is support at both the top and bottom of the sash. Lift the sash slightly to unhook it from the hinges, turning it upright so that the hinges are at the top.
Note: There are a series of pre-punched holes in the side of the sash as well as a series of adjustment holes on the hinge.
Remove the screw and slide the hinge up or down depending on the adjustment.
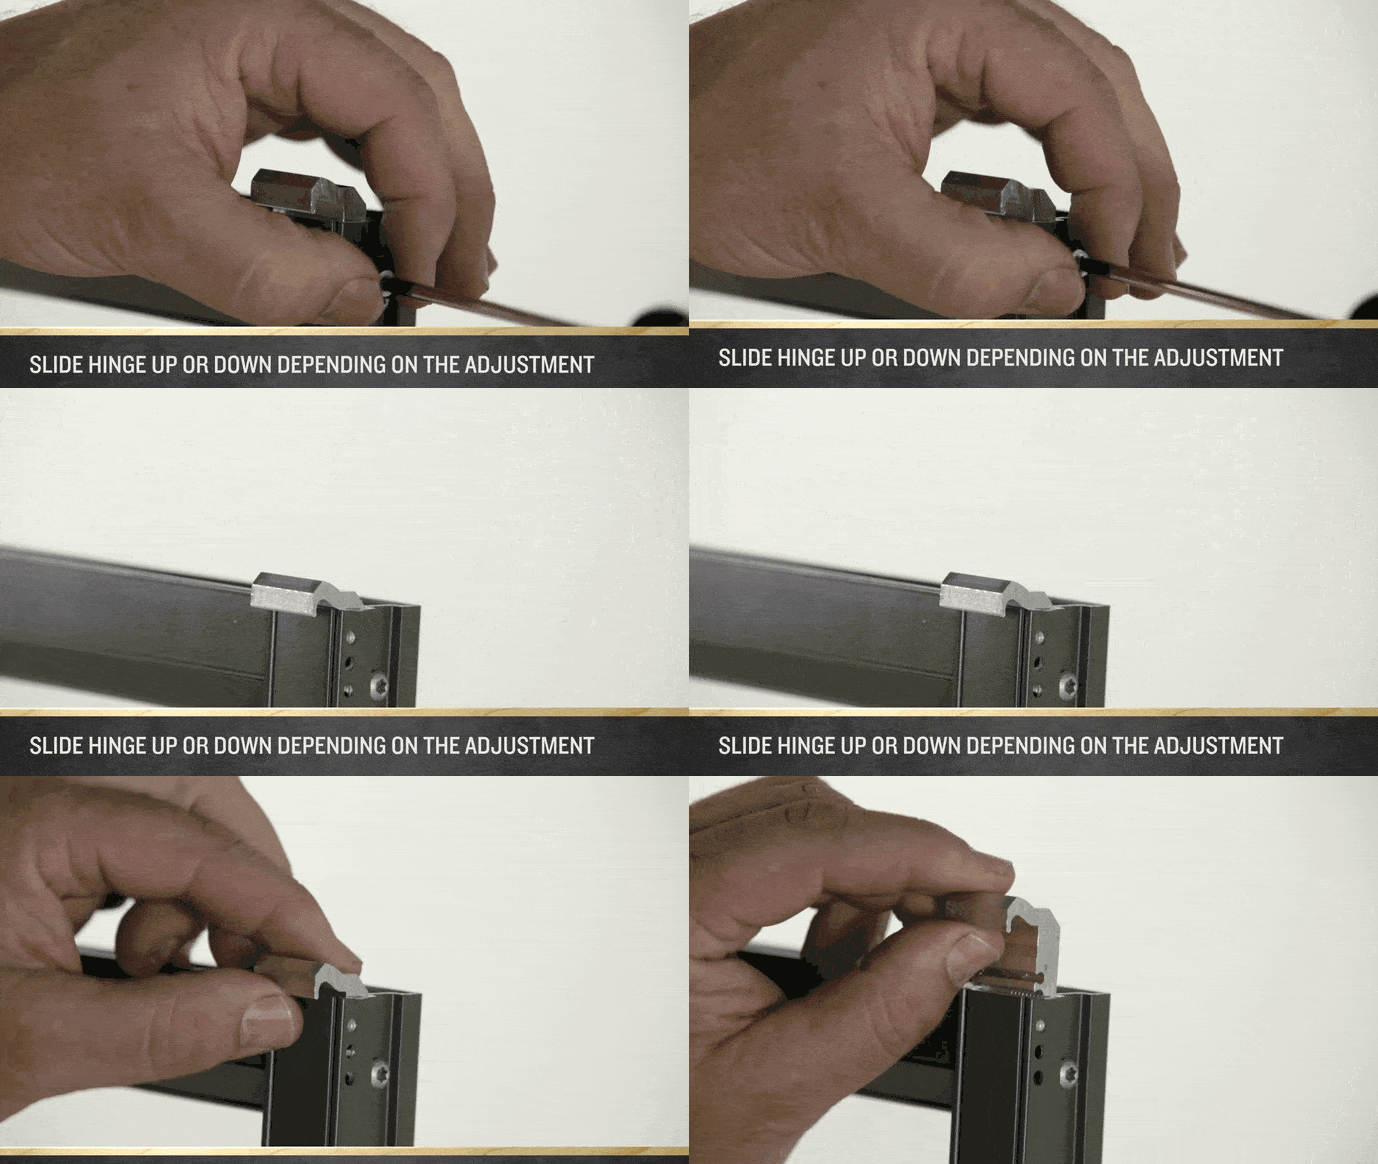
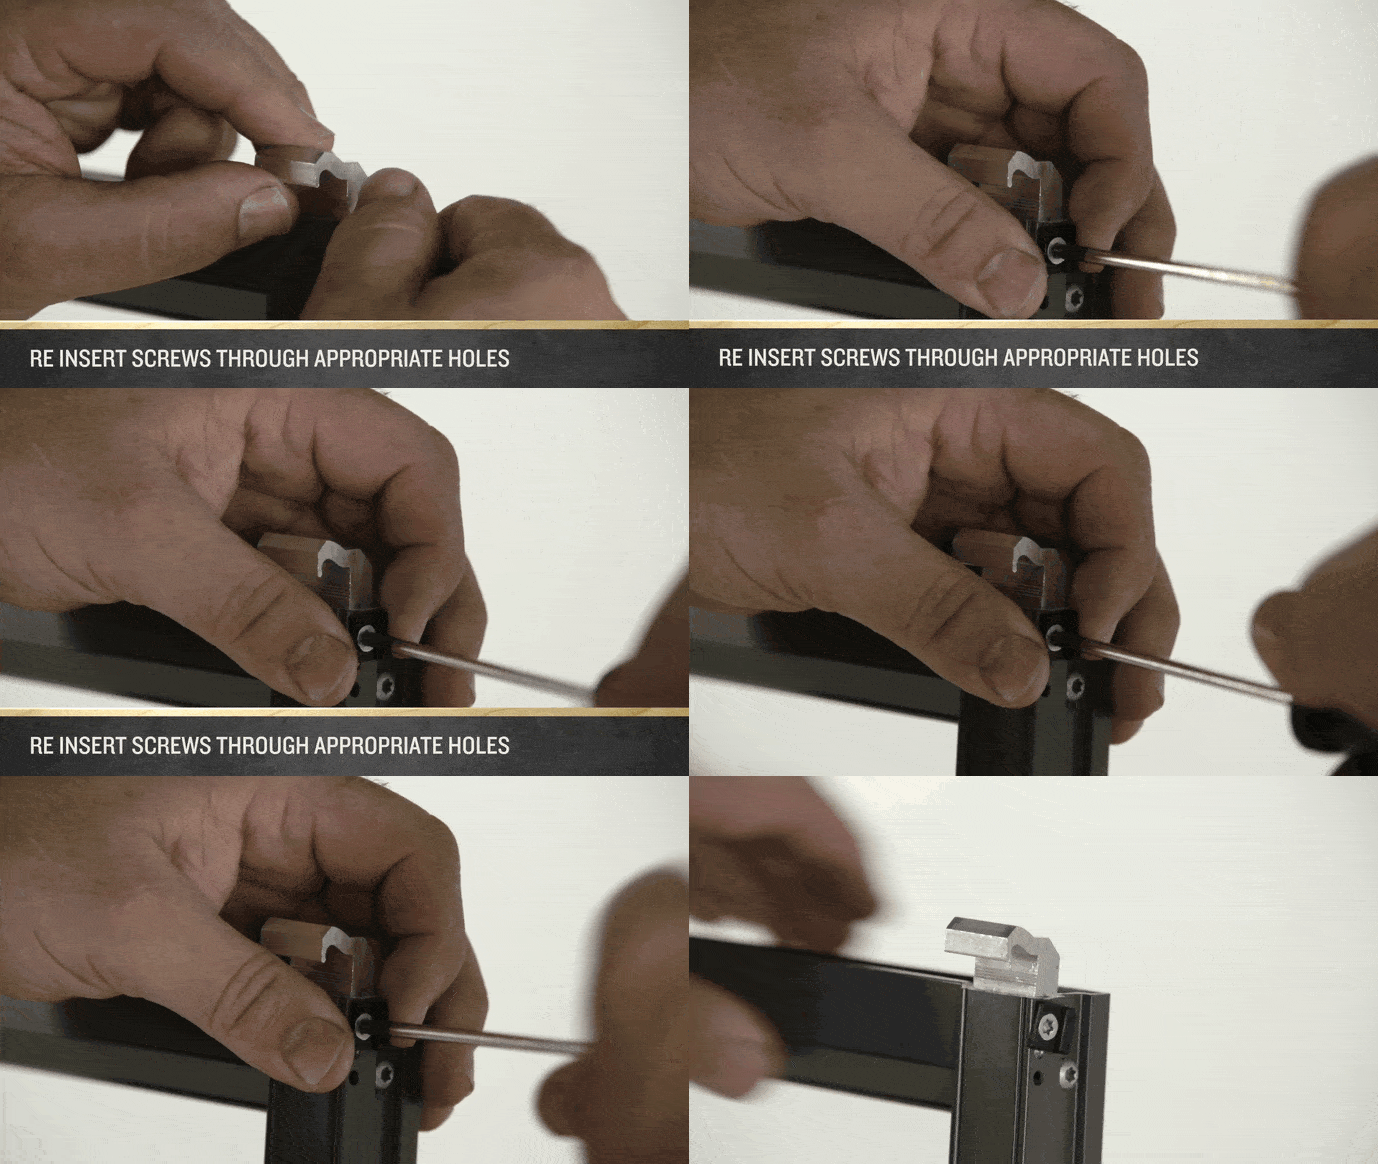
Once in the desired position, reinsert the screw through the appropriate holes.
If required, repeat the process on the other side of the sash.
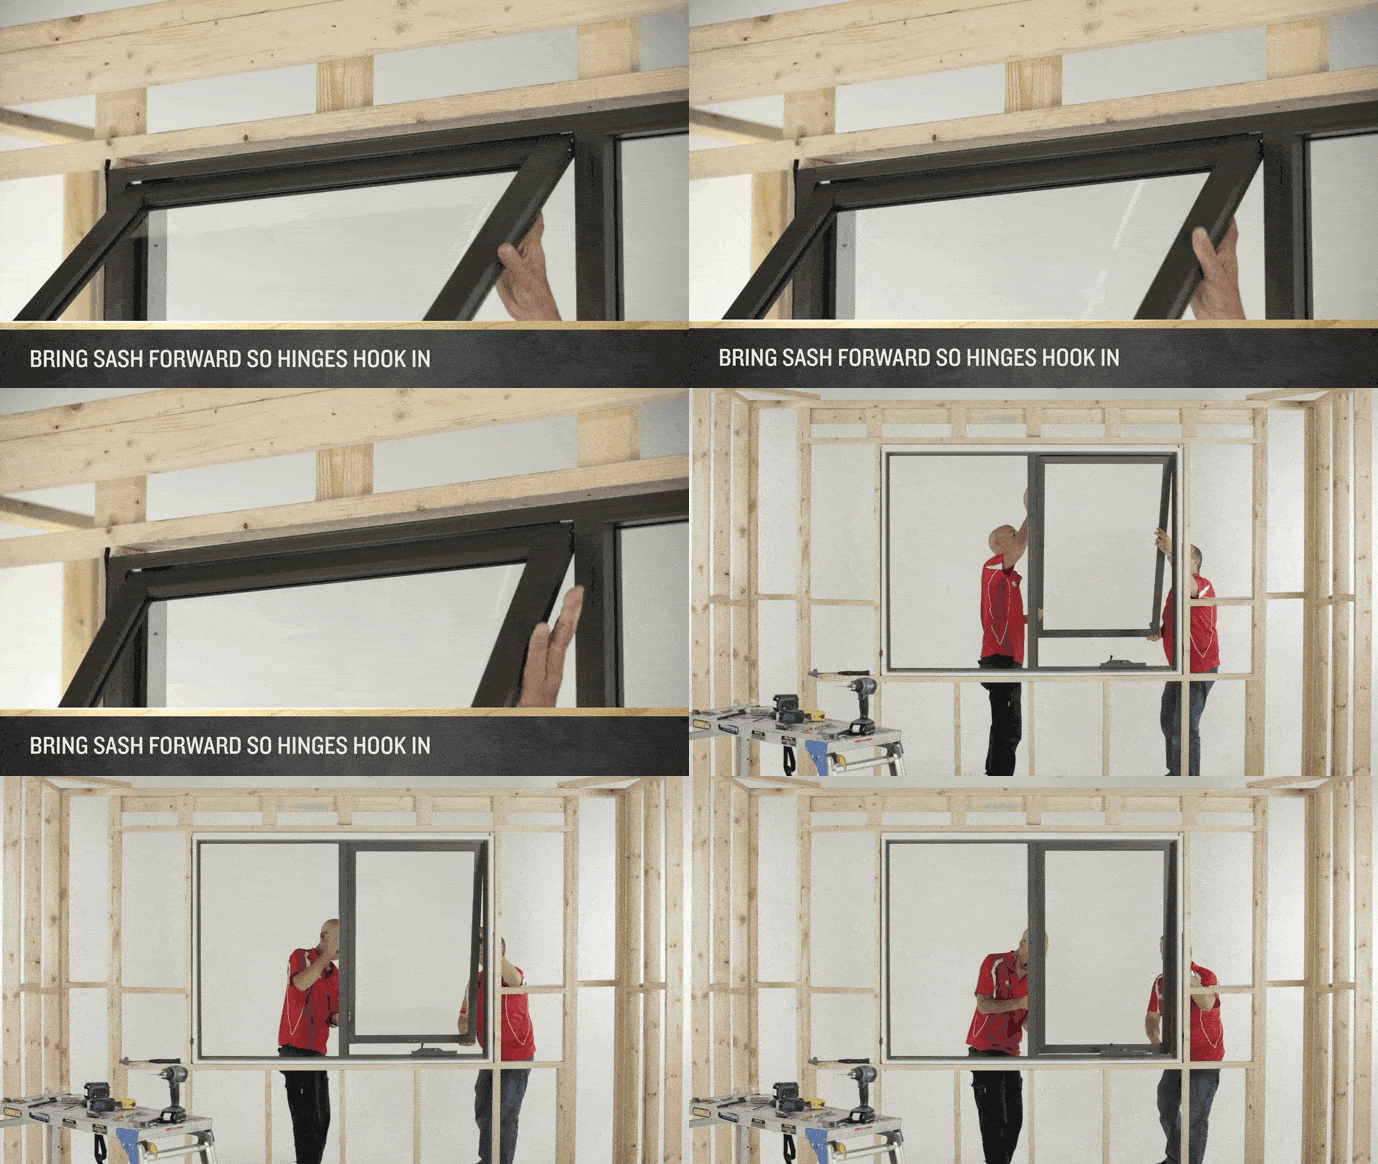
To rehang the sash, lift it up into the back of the head on the 60 degree angle, and then bring it forward so that the hinges hook in.
Once engaged, gently lower the bottom of the sash down into position.
Check that you are happy with the new sash position. If not, remove the sash and adjust further as required.
If you’re satisfied, return to the inside of the window and reattach the chain bracket to the sash, tightening the screws once in position.

Wind the window closed to ensure it is sealing correctly.

Reattach the aluminium trim at the head of the window by gently tapping it back into place with a mallet.
Want to learn more about A&L’s range of windows and doors? From sliding windows and sashless solutions, to louvres and awnings, our family of products are designed for maximum durability, and to suit every style – from traditional to contemporary.